

What you need and how to get it for MergedAnalytics<–>iContact Follow the steps below to get the information needed to configure an Integration between MergedAnalytics and iContact.
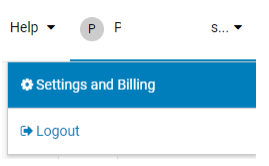
- Login to iContact and go to your Account Profile (in the upper right, click your Name/Acct Name, and select “Settings and Billing” from the drop down)
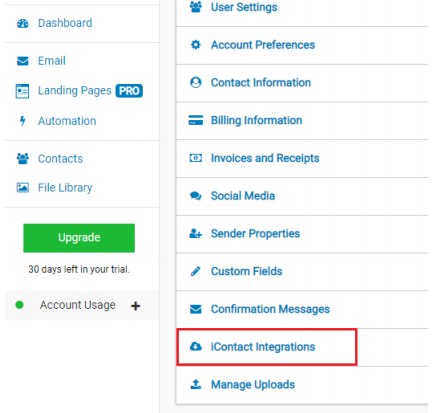
2. Next, select “iContact Integrations” from the new choices on the “Settings and Billing” page.
3. You may or may not already have an integration, but you can have more than one, and it is recommended that you use a different/separate integrations for each platform. This will start that process.

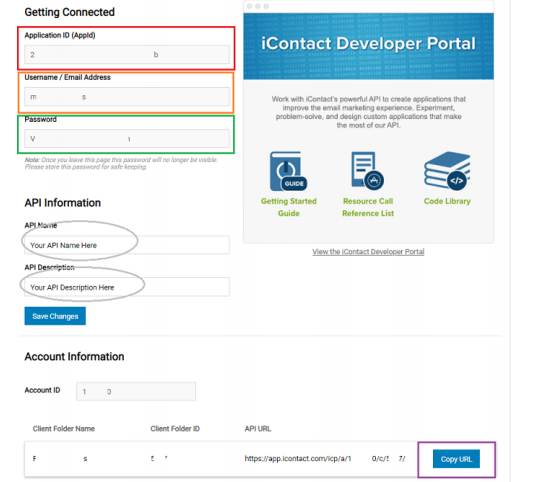
4. In this screen shot you have everything you need to capture. The AppID (outlined in red), your username/email address (outlined in orange), your API Password (outlined in green). In the API Information, just enter what will help you remember what this integration is for, we don’t need it in MergedAnalytics. You also need to click the “Copy URL” button at the bottom (outlined in purple). So you have 4 items to copy over to MergedAnalytics
from here.
5. There is one more item that you will need to both create and copy to MergedAnalytics for the Integration to be complete. Unlike many ESPs, the stand alone iContact application does not allow you to pass a contact’s Unique ID in any way, thus, you must create a Custom Field and generate your own Unique ID for the contact to integrate with MergedAnalytics. To make this easy you can use this embedded spreadsheet (in step #10) to
generate an ID and upload it back into the iContact system.
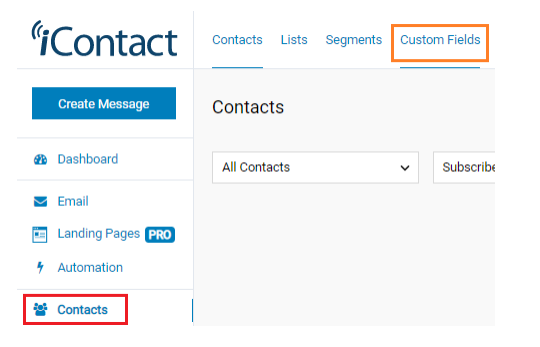
6. To create a Custom Field, just go to the “Contacts” section and choose “Custom Fields” from the top menu.
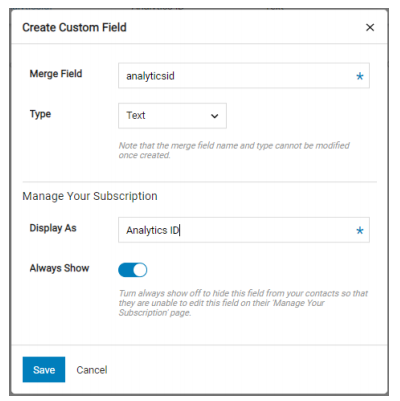
7. On the “Custom Field” page, click the “Create Field” in the upper right.

8. In the prompt, enter the necessary information. We recommend the “Merge Field” to be analyticsid (all lower case as it is case-sensitive). It can be anything you want, but we recommend the name in the Merge Field be all lower case for ease of implementation.
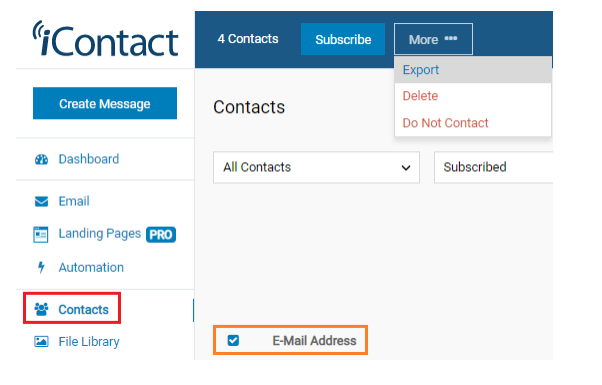
9. Now you need to export your current contact list. Go to the “Contacts” area, click the “E-mail Address” check box and the header will change. Click the “More…” button and you can export the current list, or all contacts.
10. Using the formula in column J of the embedded spreadsheet below will allow you to set a Unique ID for each contact. ***NOTE: This formula does not guarantee a unique value it is just a 16 digit random number so make certain all the entries on your list are unique. Then save the spreadsheet and upload the changes back into iContact.
You are now ready to configure the iContact API Configuration in MergedAnalytics!
Adding the Configuration information to MergedAnalytics for use
Once you have done the steps above to get the needed information for an integration into iContact, do the following to configure your account to use this integration.
- Sign into your account on the MergedAnalytics Portal (https://portal.mergedanalytics.com/results)
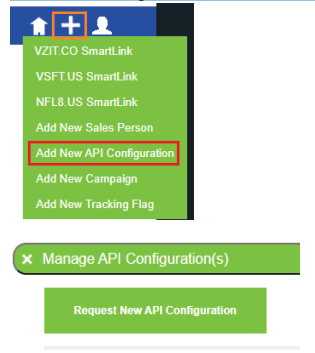
2. Either from the “+” logo, or the “Admin Tools” section, use the “Add New API Configuration Tool”.
3. On the form that appears you need to select/enter a few items and the configuration will be complete.
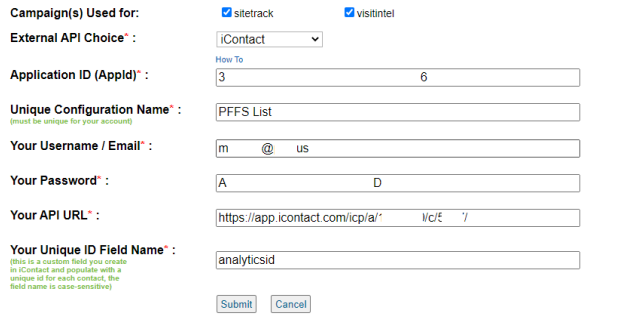
If your account has multiple “Campaigns” and this configuration should be used by more than one, select the necessary checkboxes (above, “sitetrack” & “visitintel” are selected). For the External API Choice, choose “iContact”. In the “Application ID (AppId)” enter the AppId assigned in Step #4 of the previous instructions. For the “Unique Configuration Name”, enter a name you will recognize this configuration by so you can select it easily when creating SmartLinks. It must be unique to your account and will be prepended with “iContact” for selection, so you don’t need to include that. The “Your Username / Email” and “Your Password” options should be filled in with the values you received from iContact in Step #4 of the previous instructions. The value for the “Your API URL” is what you get when you click the “Copy URL” button in Step #4 of the previous instructions. Finally, the field “Your Unique ID Field Name” is the “Merge Field” name you gave to your Custom Field in Step 8 of the previous instructions. **NOTE: the field name is case-sensitive, type it exactly as you did when creating the Custom Field**. Click “Submit” and you are ready to use the configuration in your SmartLinks.
Using an API Configuration with SmartLinks in the MergedAnalytics Portal
Once you have created one or more API Configurations, you can now use them when creating SmartLinks. To do this,
create a SmartLink (works with all types of SmartLinks other than the VanillaSoft SmartLink).
- Login to the MergedAnalytics Portal (https://portal.mergedanalytics.com/results)
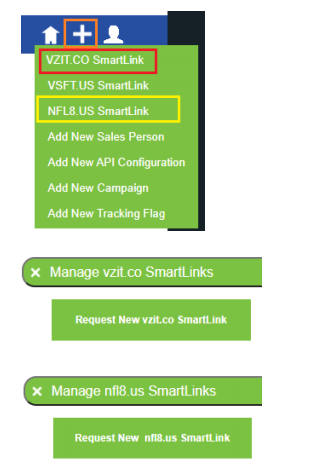
2. Either from the “+” logo, or the “Admin Tools” section, use the “VZIT.CO SmartLink” or your branded SmartLink (in these examples nfl8.us) option to create a new SmartLink request. Generally, you will not see both, if a branded SmartLink is available, it is likely the one you will see.
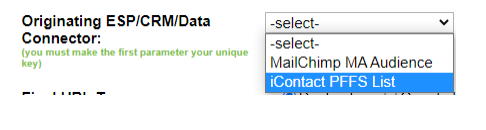
3. When creating the SmartLink, be certain to then select your “iContact” configuration for the “Originating ESP/CRM” drop down.
4. Now, just use the SmartLink you created, and add the appropriate Merge Field tag as a variable on the end. The sample we show you is the correct one for iContact. For example it might look like the following (sticking with our example thus far):
http://nfl8.us/MC_ANNOUCEMENT_EMAIL/[analyticsid]
Add that to a link you want to track in the email, just as you see above, and our system will get the Unique ID of the contact in iContact. When the traffic is received we use the configuration to access iContact and get the user’s Email address and associate it to that user’s activity….not just with the email but future anonymous web
visits as well.